Trezor.io/Start: Your Ultimate Guide to Getting Started with Trezor
If you’re exploring the world of cryptocurrency, security is the number one priority. Trezor.io/start is the official starting point for anyone looking to set up a Trezor hardware wallet. Trezor wallets are widely recognized for their robust security features, user-friendly interface, and seamless compatibility with multiple cryptocurrencies. This guide will walk you through everything you need to know about trezor.io/start, from setting up your device to securing your digital assets effectively.
What is Trezor?
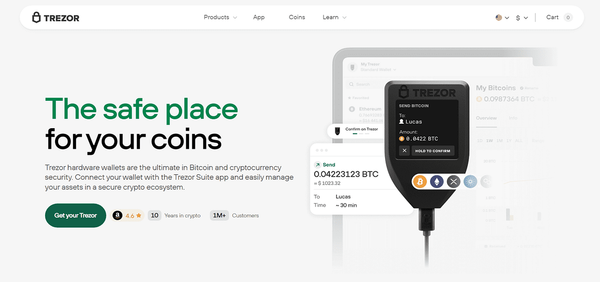
Trezor is a hardware wallet designed to safeguard your cryptocurrency offline. Unlike software wallets that are connected to the internet, a Trezor device stores your private keys securely offline, reducing the risk of hacks, phishing attacks, and malware.
By visiting trezor.io/start, users are guided step-by-step to initialize their wallet, set up PIN protection, and generate a recovery seed. This process ensures that your digital assets remain safe even if your device is lost or stolen.
Why Use Trezor?
Security is the primary reason users choose Trezor. Here’s why Trezor is trusted by crypto enthusiasts worldwide:
- Offline Storage: Your private keys never leave the device, protecting your crypto from online attacks.
- User-Friendly Interface: With Trezor Suite, managing multiple cryptocurrencies becomes intuitive.
- Multi-Currency Support: Trezor supports hundreds of coins, including Bitcoin, Ethereum, Litecoin, and many ERC-20 tokens.
- Regular Firmware Updates: Trezor ensures ongoing security with firmware upgrades accessible via trezor.io/start.
These features make Trezor the perfect choice for both beginners and seasoned cryptocurrency investors.
How to Start at Trezor.io/Start
Getting started with Trezor is simple, thanks to the official trezor.io/start portal. Here’s a step-by-step breakdown:
Step 1: Purchase a Trezor Device
Only buy Trezor from official sources like trezor.io to avoid counterfeit devices. Currently, Trezor offers two main models: Trezor Model One and Trezor Model T. Both provide strong security, but the Model T includes a touchscreen for easier navigation.
Step 2: Connect Your Device
Once you have your Trezor, connect it to your computer using the provided USB cable. Trezor.io/start will automatically detect your device and guide you to the official Trezor Suite download.
Step 3: Install Trezor Suite
Trezor Suite is the desktop and web app that allows you to manage your cryptocurrency securely. After installation, launch the app and follow the instructions to initialize your Trezor device. Remember, always download Trezor Suite from trezor.io/start for safety.
Step 4: Create a PIN
Your Trezor wallet is protected by a PIN. Choose a strong, unique PIN that only you can remember. This adds an extra layer of security, preventing unauthorized access to your crypto assets.
Step 5: Generate a Recovery Seed
A recovery seed is a list of 24 words generated during setup. This seed is the key to recovering your wallet if the device is lost or damaged. Write it down carefully and store it in a secure, offline location. Do not store your recovery seed digitally or share it with anyone. trezor.io/start provides clear instructions to safely record your seed.
Using Trezor Suite
Once your device is set up, Trezor Suite allows you to:
- Send and receive cryptocurrencies
- Monitor your portfolio in real time
- Exchange coins through integrated services
- Update your device firmware securely
Navigating the Trezor Suite is straightforward, and all official tutorials are available on trezor.io/start, making the experience beginner-friendly.
Best Practices for Security
Even with Trezor’s high-level security, following best practices ensures maximum protection for your crypto:
- Buy Only from Official Sources: Always use trezor.io/start for downloads and purchases.
- Keep Your Recovery Seed Offline: Never store your recovery seed online.
- Update Firmware Regularly: Regular updates prevent vulnerabilities and maintain optimal security.
- Enable Passphrase Protection: This optional feature adds another layer of security to your wallet.
- Avoid Phishing Links: Only trust official Trezor communications and links.
Following these practices alongside Trezor’s built-in features guarantees the safety of your digital assets.
Trezor.io/Start for Beginners
For newcomers, trezor.io/start is not just a setup page—it’s an educational hub. It provides:
- Step-by-step setup guides
- Video tutorials for Trezor Suite
- FAQs addressing common concerns
- Security tips and troubleshooting
By following the official instructions, even beginners can set up their hardware wallet in minutes without compromising security.
Why Trezor is a Long-Term Investment
Investing in a Trezor device is investing in peace of mind. Cryptocurrency is prone to online threats, and keeping assets on exchanges exposes you to unnecessary risk. Trezor, paired with guidance from trezor.io/start, ensures your crypto is stored safely, giving you full control over your finances. Whether you are a day trader or a long-term holder, Trezor is an essential tool for secure cryptocurrency management.
Conclusion
Starting your journey with Trezor is simple when you use the official trezor.io/start portal. From purchasing the device to setting up a recovery seed and managing your crypto through Trezor Suite, every step is guided for maximum security and ease of use. By following the steps outlined above, you can confidently safeguard your digital assets and enjoy the freedom of managing your cryptocurrency without fear of online threats.
Visit trezor.io/start today to begin your secure cryptocurrency journey with Trezor—the hardware wallet trusted by millions worldwide.